Charles E W Bean, Diaries, AWM38 3DRL 606/16/1 - August - September 1915 - Part 1
AWM38
Official History,
1914-18 War: Records of C E W Bean,
Official Historian.
Diaries and Notebooks
Item number: 3DRL606/16/1
Title: Diary, August - September 1915
Includes reference to 8th Light Horse Regiment,
Hill 60 and Turkish dispositions.
AWM38-3DRL606/16/1
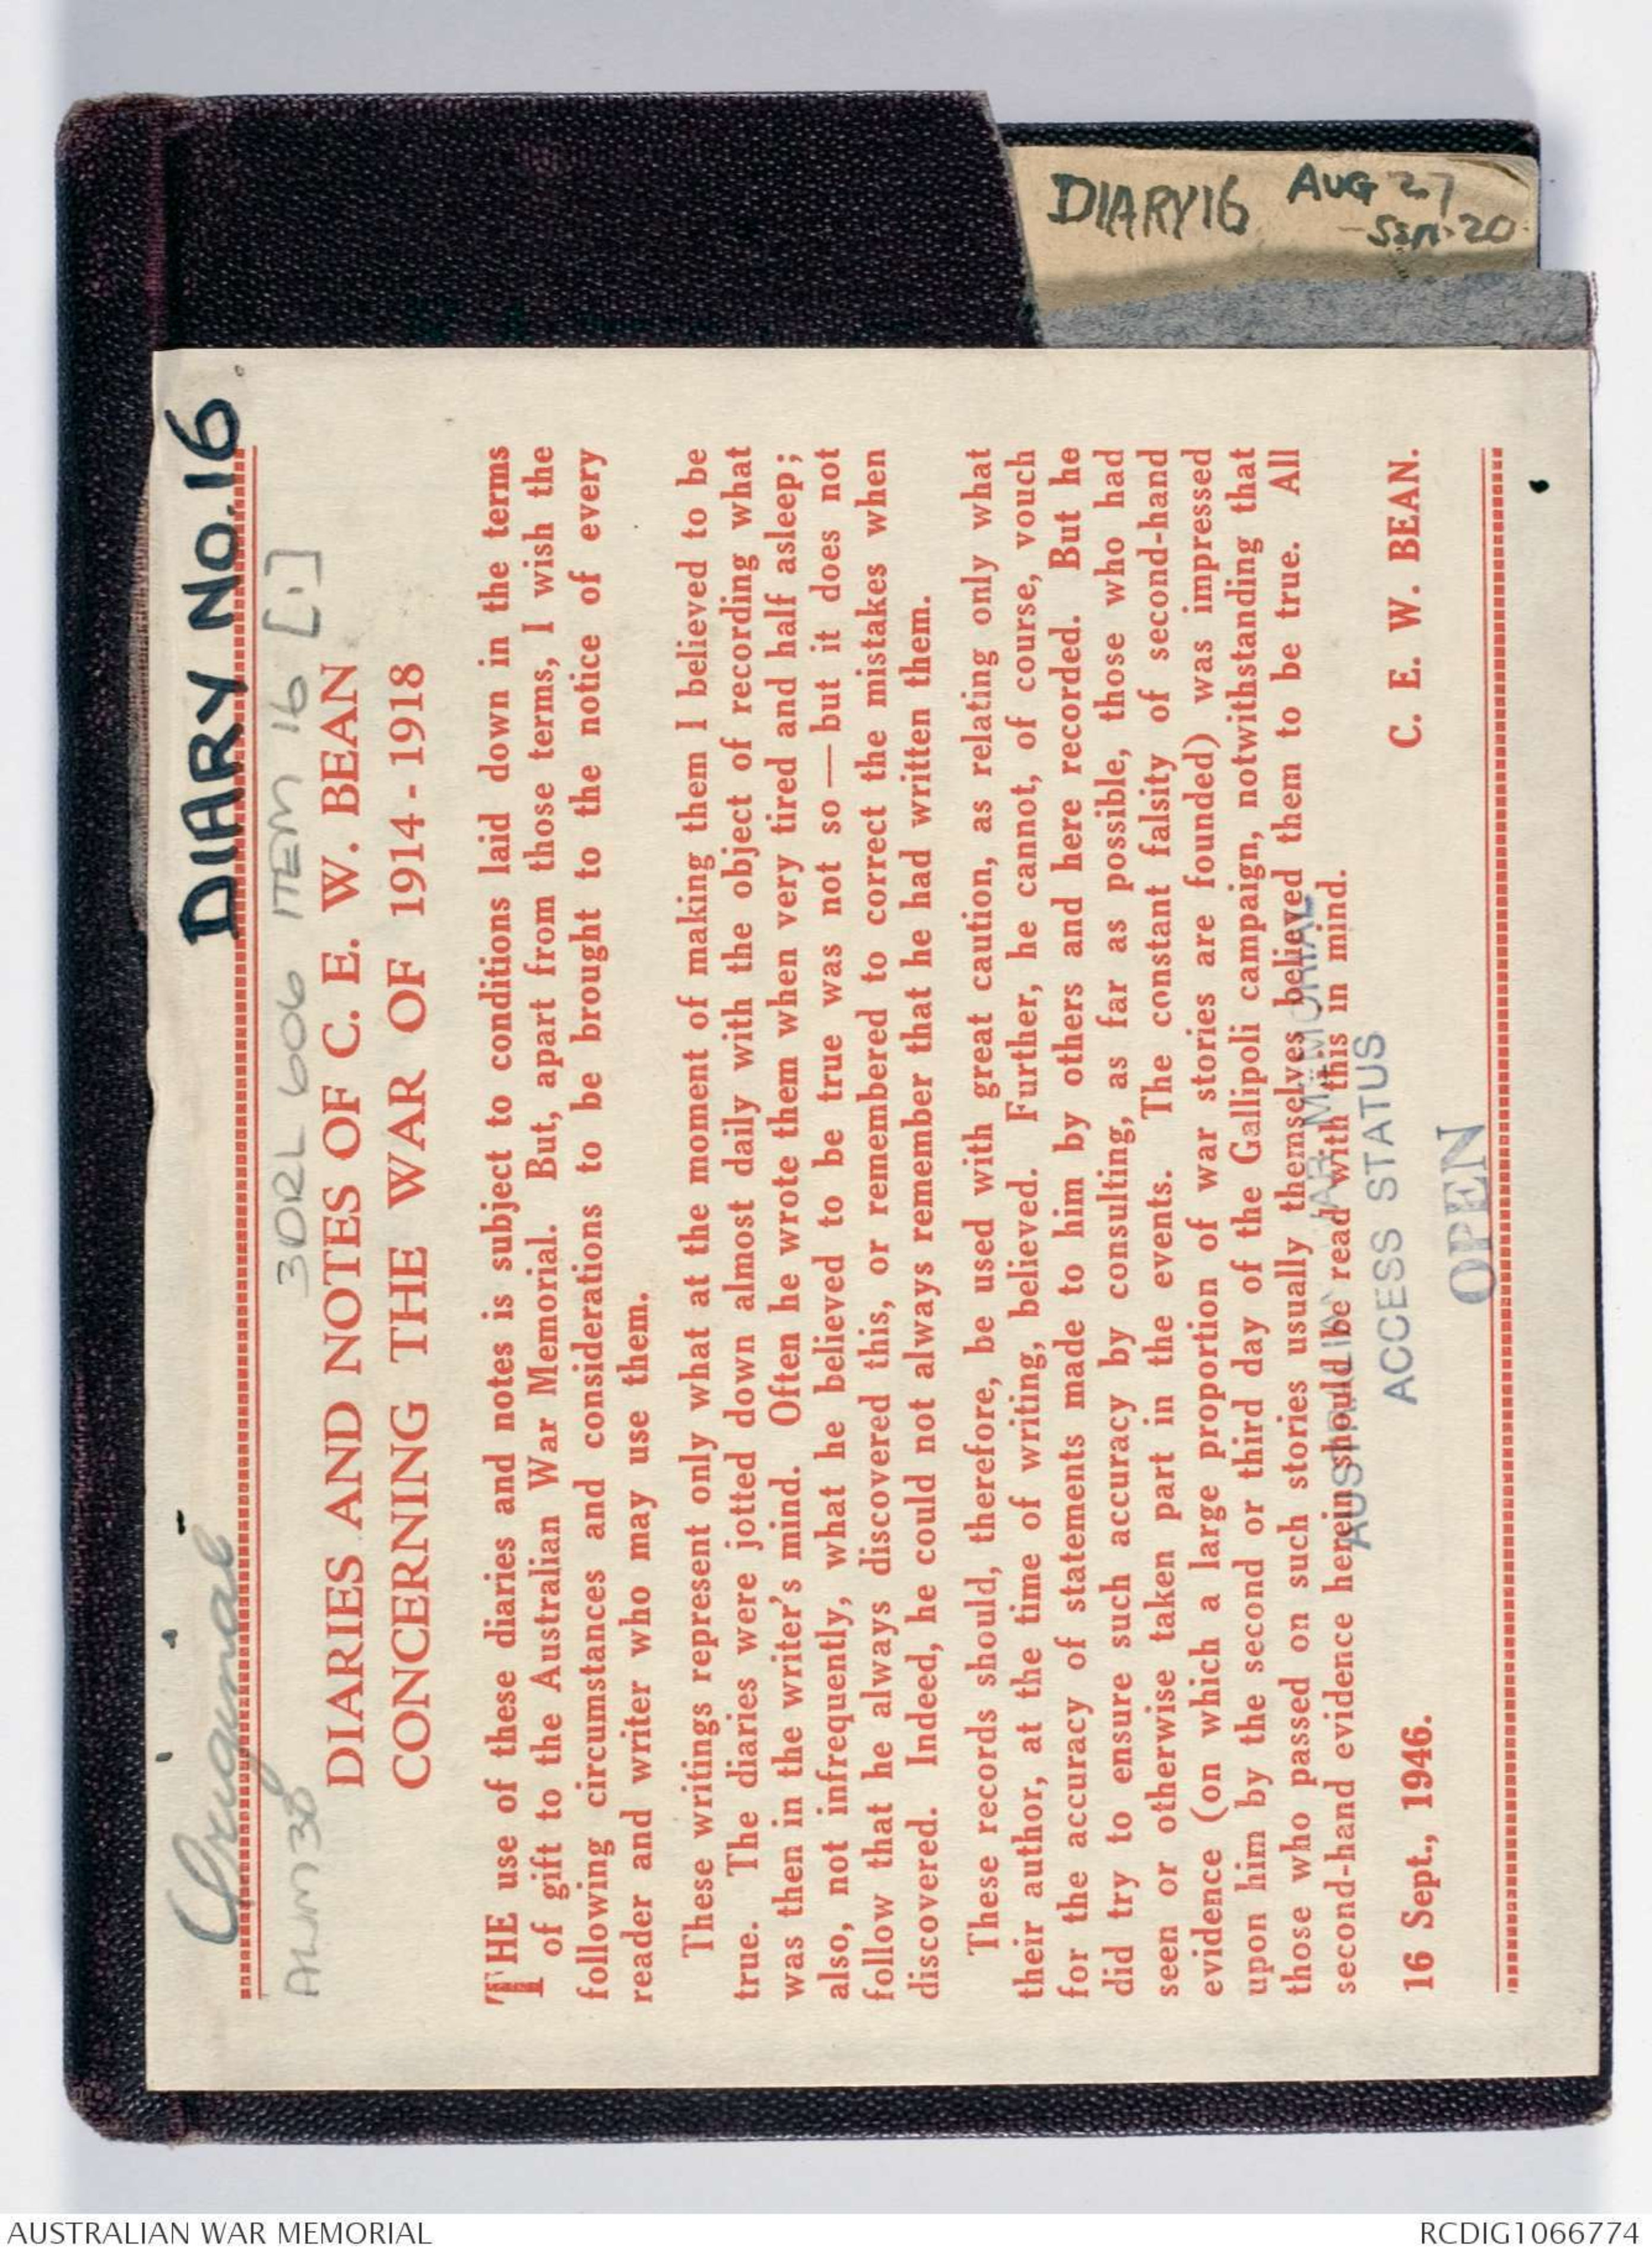
Original
Diary No.16
AWM38
3DRL 606 ITEM 16 [1]
DIARIES AND NOTES OF C. E. W. BEAN
CONCERNING THE WAR OF 1914-1918
THE use of these diaries and notes is subject to conditions laid down in the terms
of gift to the Australian War Memorial. But, apart from those terms, I wish the
following circumstances and considerations to be brought to the notice of every
reader and writer who may use them.
These writings represent only what at the moment of making them I believed to be
true. The diaries were jotted down almost daily with the object of recording what
was then in the writer's mind. Often he wrote them when very tired and half asleep;
also, not infrequently, what he believed to be true was not so - but it does not
follow that he always discovered this, or remembered to correct his mistakes when
discovered. Indeed, he could not always remember that he had written them.
These records should, therefore, be used with great caution, as relating only what
their author, at the time of writing, believed. Further, he cannot, of course, vouch
for the accuracy of statements made to him by others and here recorded. But he
did try to ensure such accuracy by consulting, as far as possible, those who had
seen or otherwise taken part in the events. The constant falsity of second-hand
evidence (on which a large proportion of war stories are founded) was impressed
upon him by the second or third day of the Gallipoli campaign, notwithstanding that
those who passed on such stories themselves believed them to be true. All
second-hand evidence herein should be read with this in mind.
16 Sept., 1946
C. E. W. BEAN
AUSTRALIAN WAR MEMORIAL
ACCESS STATUS
OPEN
(16) DIARY 16
AUG 27
- SEPT. 20
Turks 7th 60
8. 110
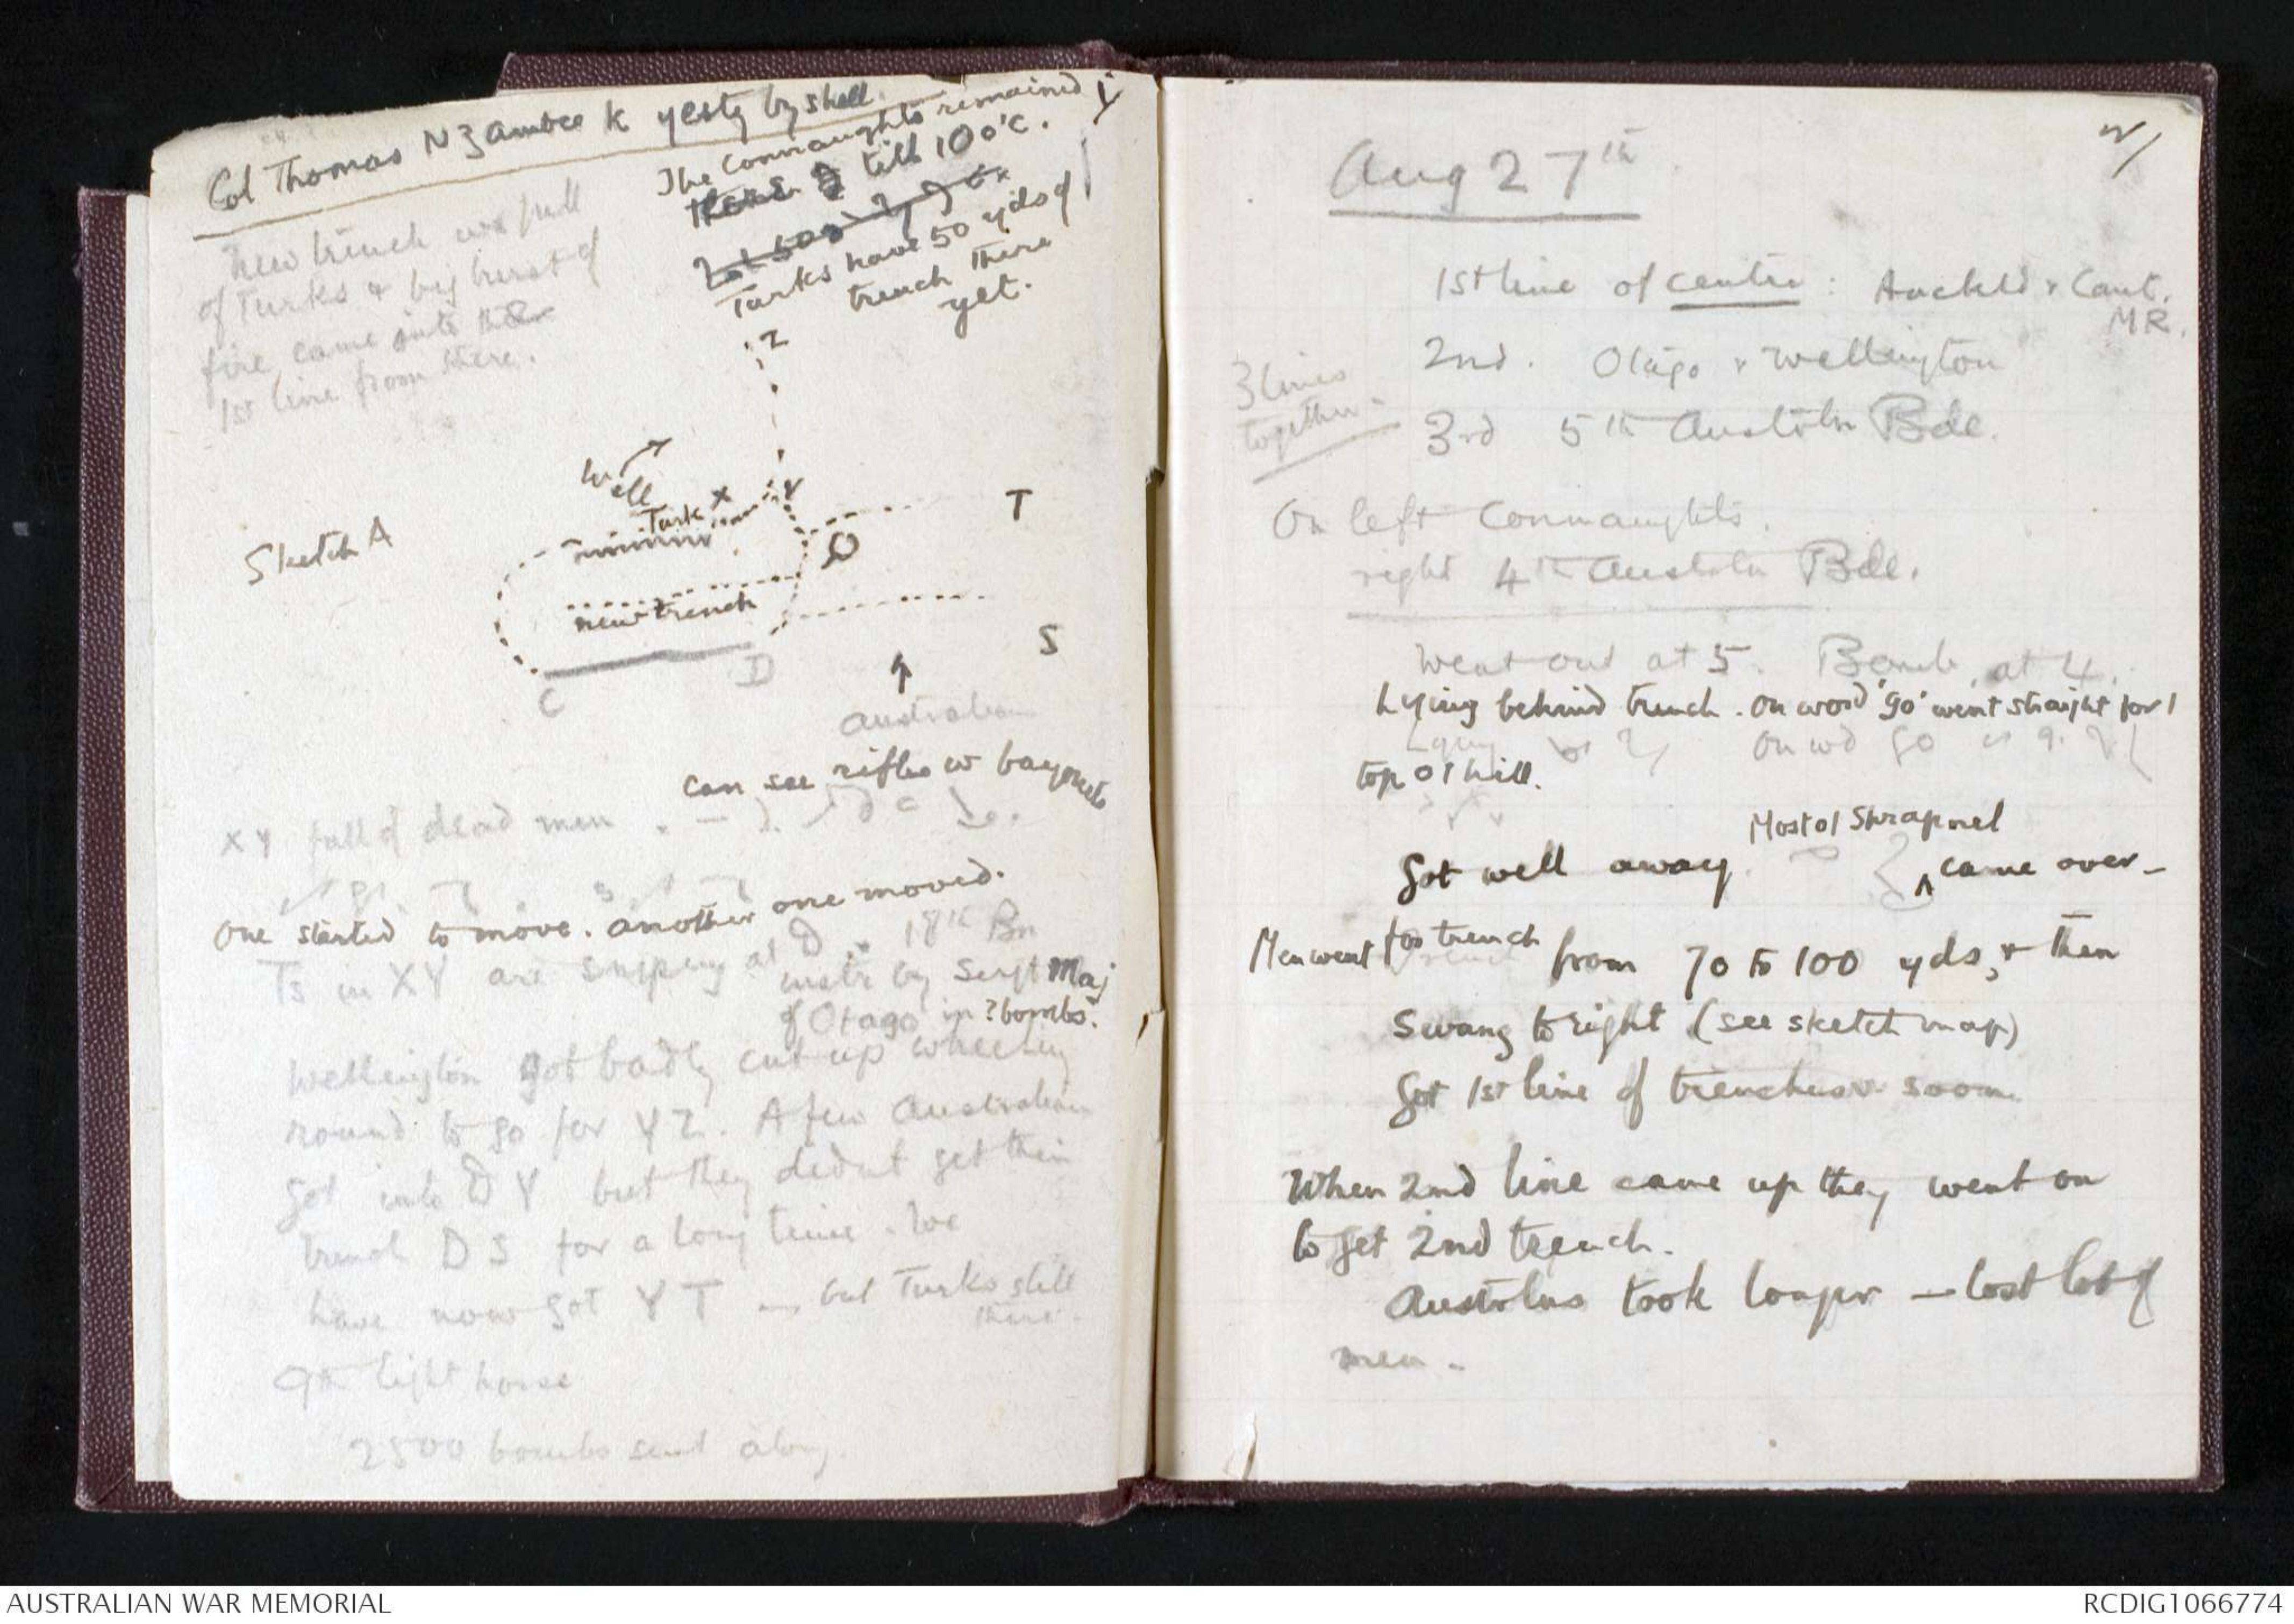
Col Thomas NZ Ambce k. yesty by shell
The Connaughts remained
there 2 till 10 o'c.
Turks have 50 yds of
trench there
yet.
New trench ws full
of Turks & big burst of
fire came onto their
1st line from there.
Hand drawn diagram – see original
XY full of dead men. Can see rifles w bayonets
One started to move. Another one moved.
Ts in XY are sniping at D. 18th Bn
Instr by Sergt Maj
of Otago in ? bombs.
Wellington got badly cut up wheeling
round to go for YZ. A few Australians
got into DY but they didnt get their
trench DS for a long time. We
have now got YT - but Turks still there.
9th light horse
2500 bombs sent along.
2
Aug 27th
1st line of Centre: Auckld & Cant. MR.
2nd. Otago & Wellington
3rd 5th Australn Bde.
[*3 lines
together*]
On left Connaughts.
right 4th Austrln Bde.
Went out at 5. Bomb at 4.
Lying behind trench. On word 'go' went straight for /
top o / hill.
Got well away. Most o / Shrapnel ^came over -
Men went for trench from 70 to 100 yds, & then
swung to right (see sketch map)
Got 1st line of trenches soon.
When 2nd line came up they went on
to get 2nd trench.
Austrlns took longer- lost lot of
men.
3
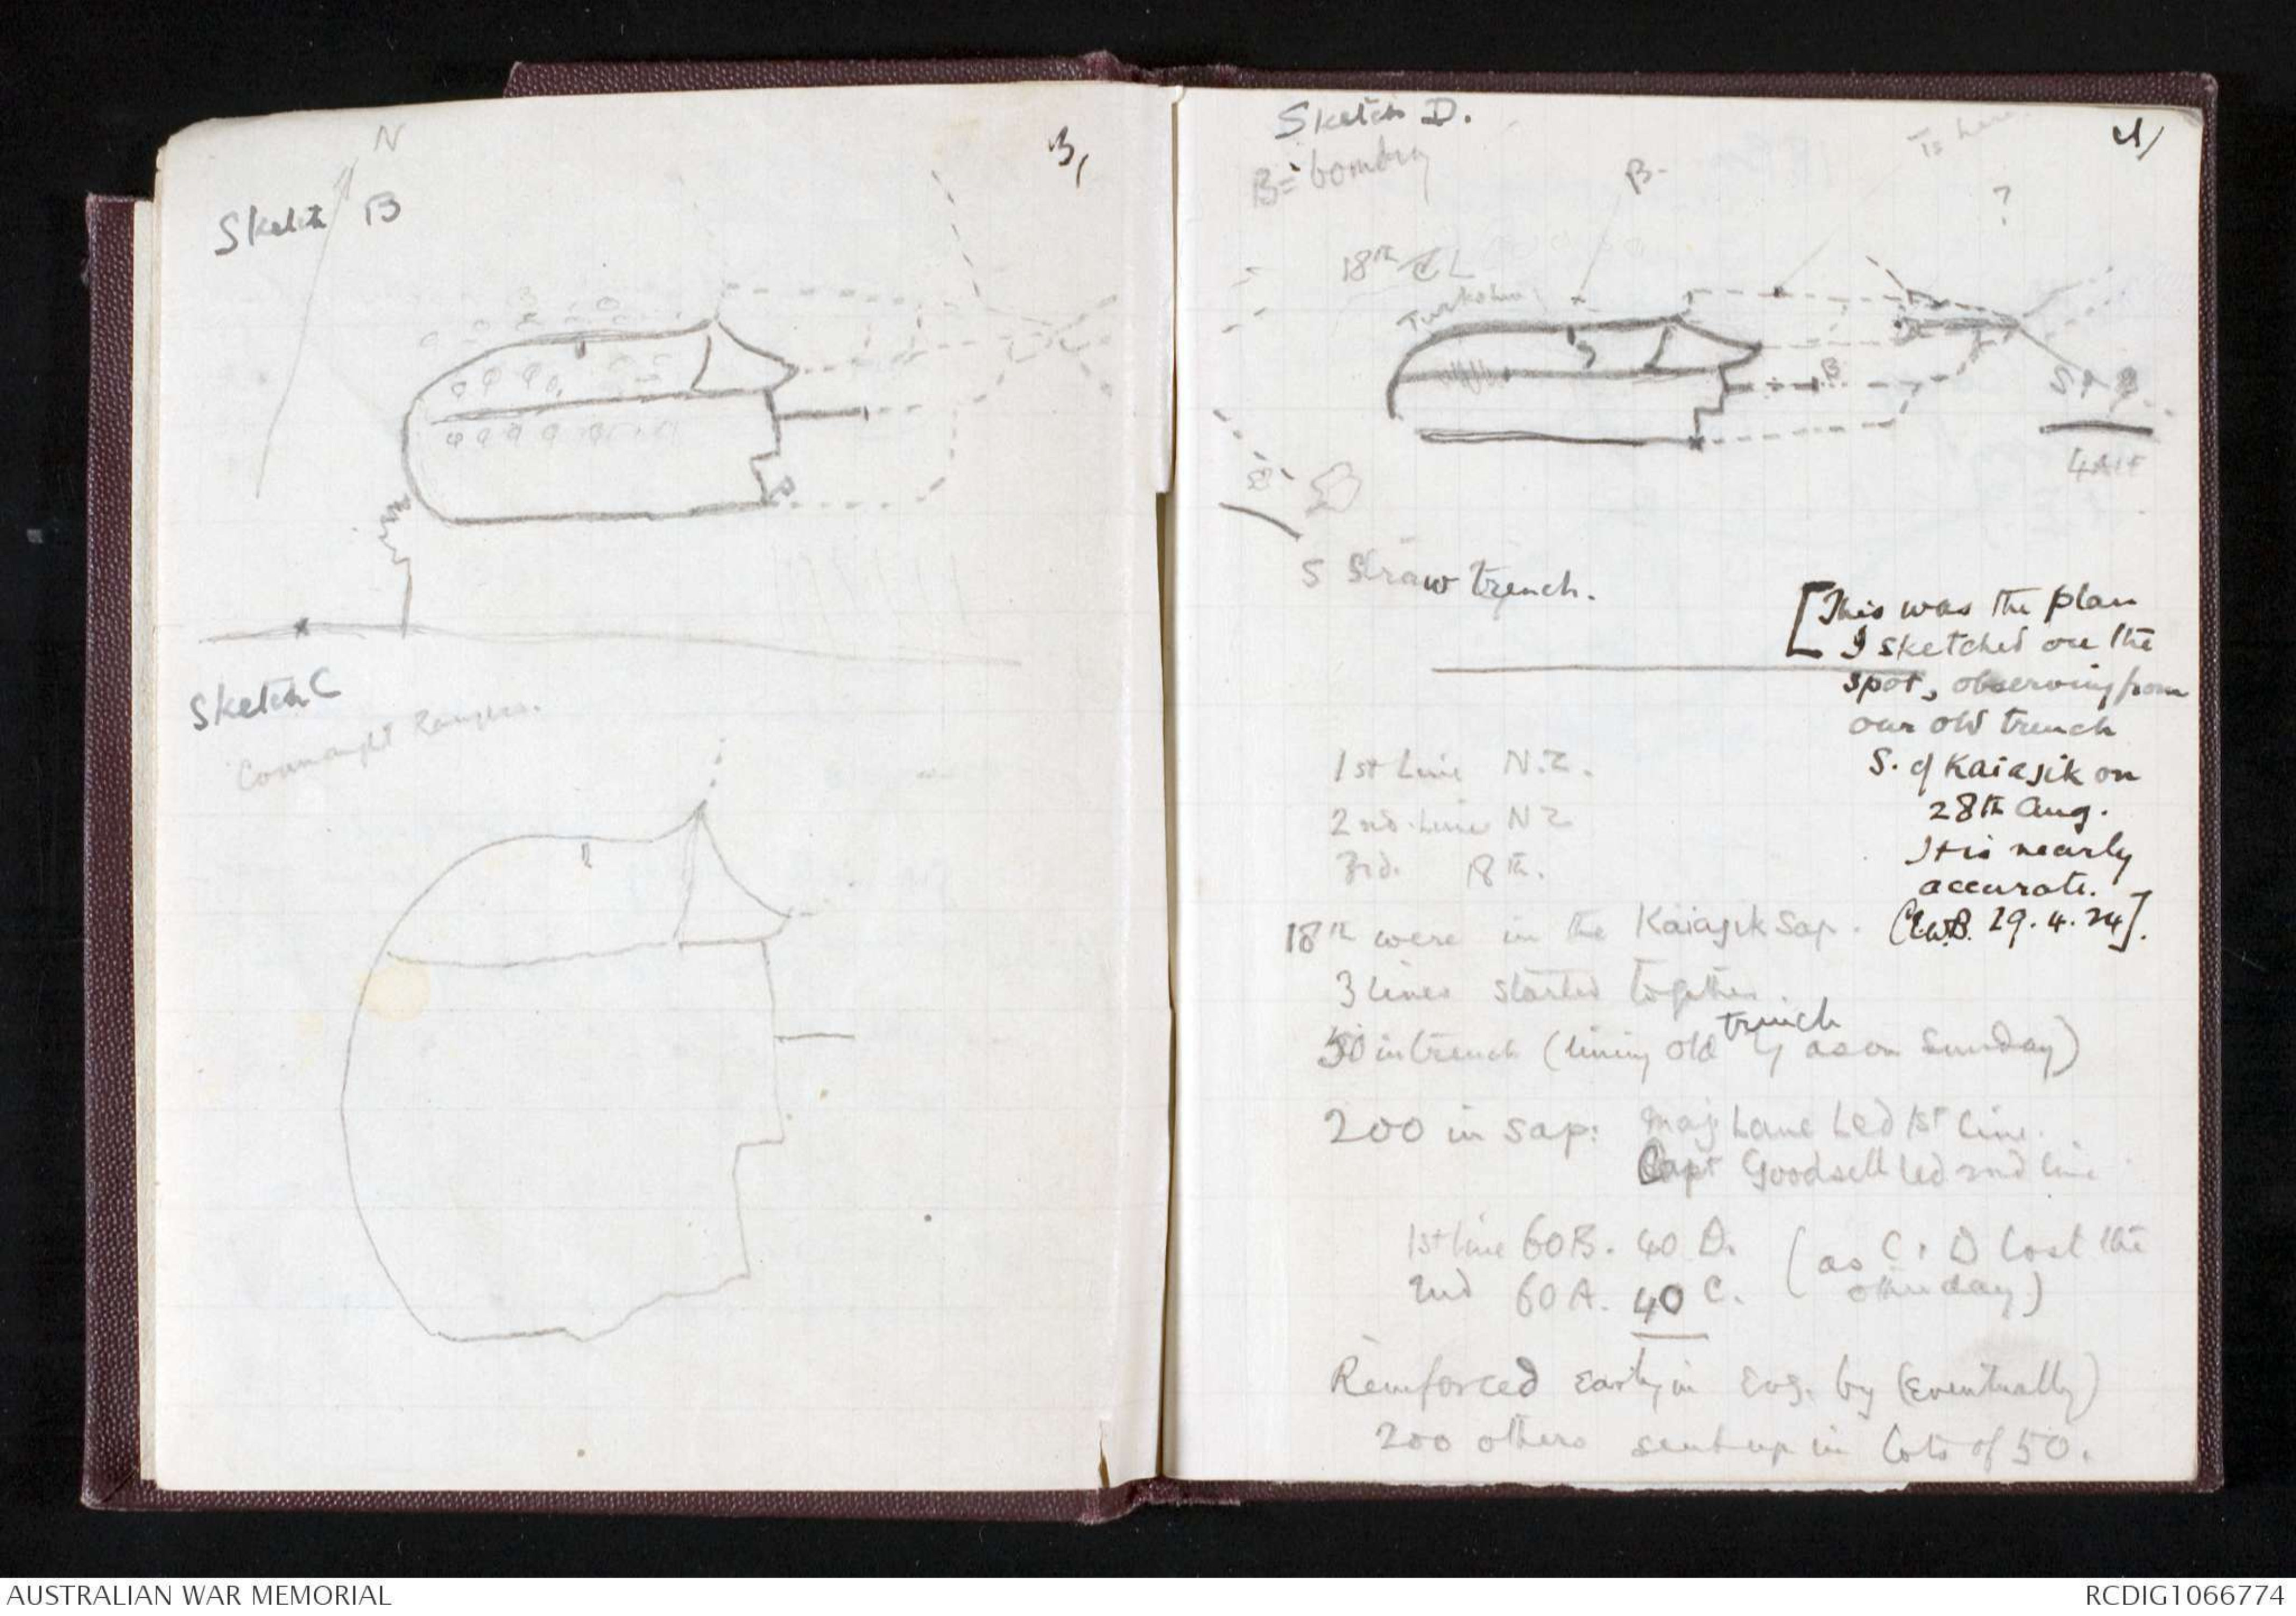
Sketch B
Hand drawn diagram – see original
Sketch C
Hand drawn diagram – see original
4
Sketch D
Hand drawn diagram – see original
[ *[This was the plan
I sketched on the
spot, observing from
our old trench
S. of Kaiajik on
28th Aug.
It is nearly
accurate.
C.E.W.B. 29.4.24].*]
1st Line N.Z.
2nd Line N.Z.
3rd 18th
18th were in the Kaiajik Sap.
3 lines started together.
50 in trench (lining old trench as on Sunday)
200 in Sap: Maj. Lane Led 1st line
Capt. Goodsell led 2nd line.
1st line 60 B. 40D.
2nd 60 A. 40 C. (as C & D lost the other day)
Reinforced early in evg. by (eventually)
200 others sent up in lots of 50.
5
18 Bn.
Lane only officer k.
3 or 4 wounded
Blacket - blind deaf & dumb
a seafaring chap.
Lane shot thro' heart.
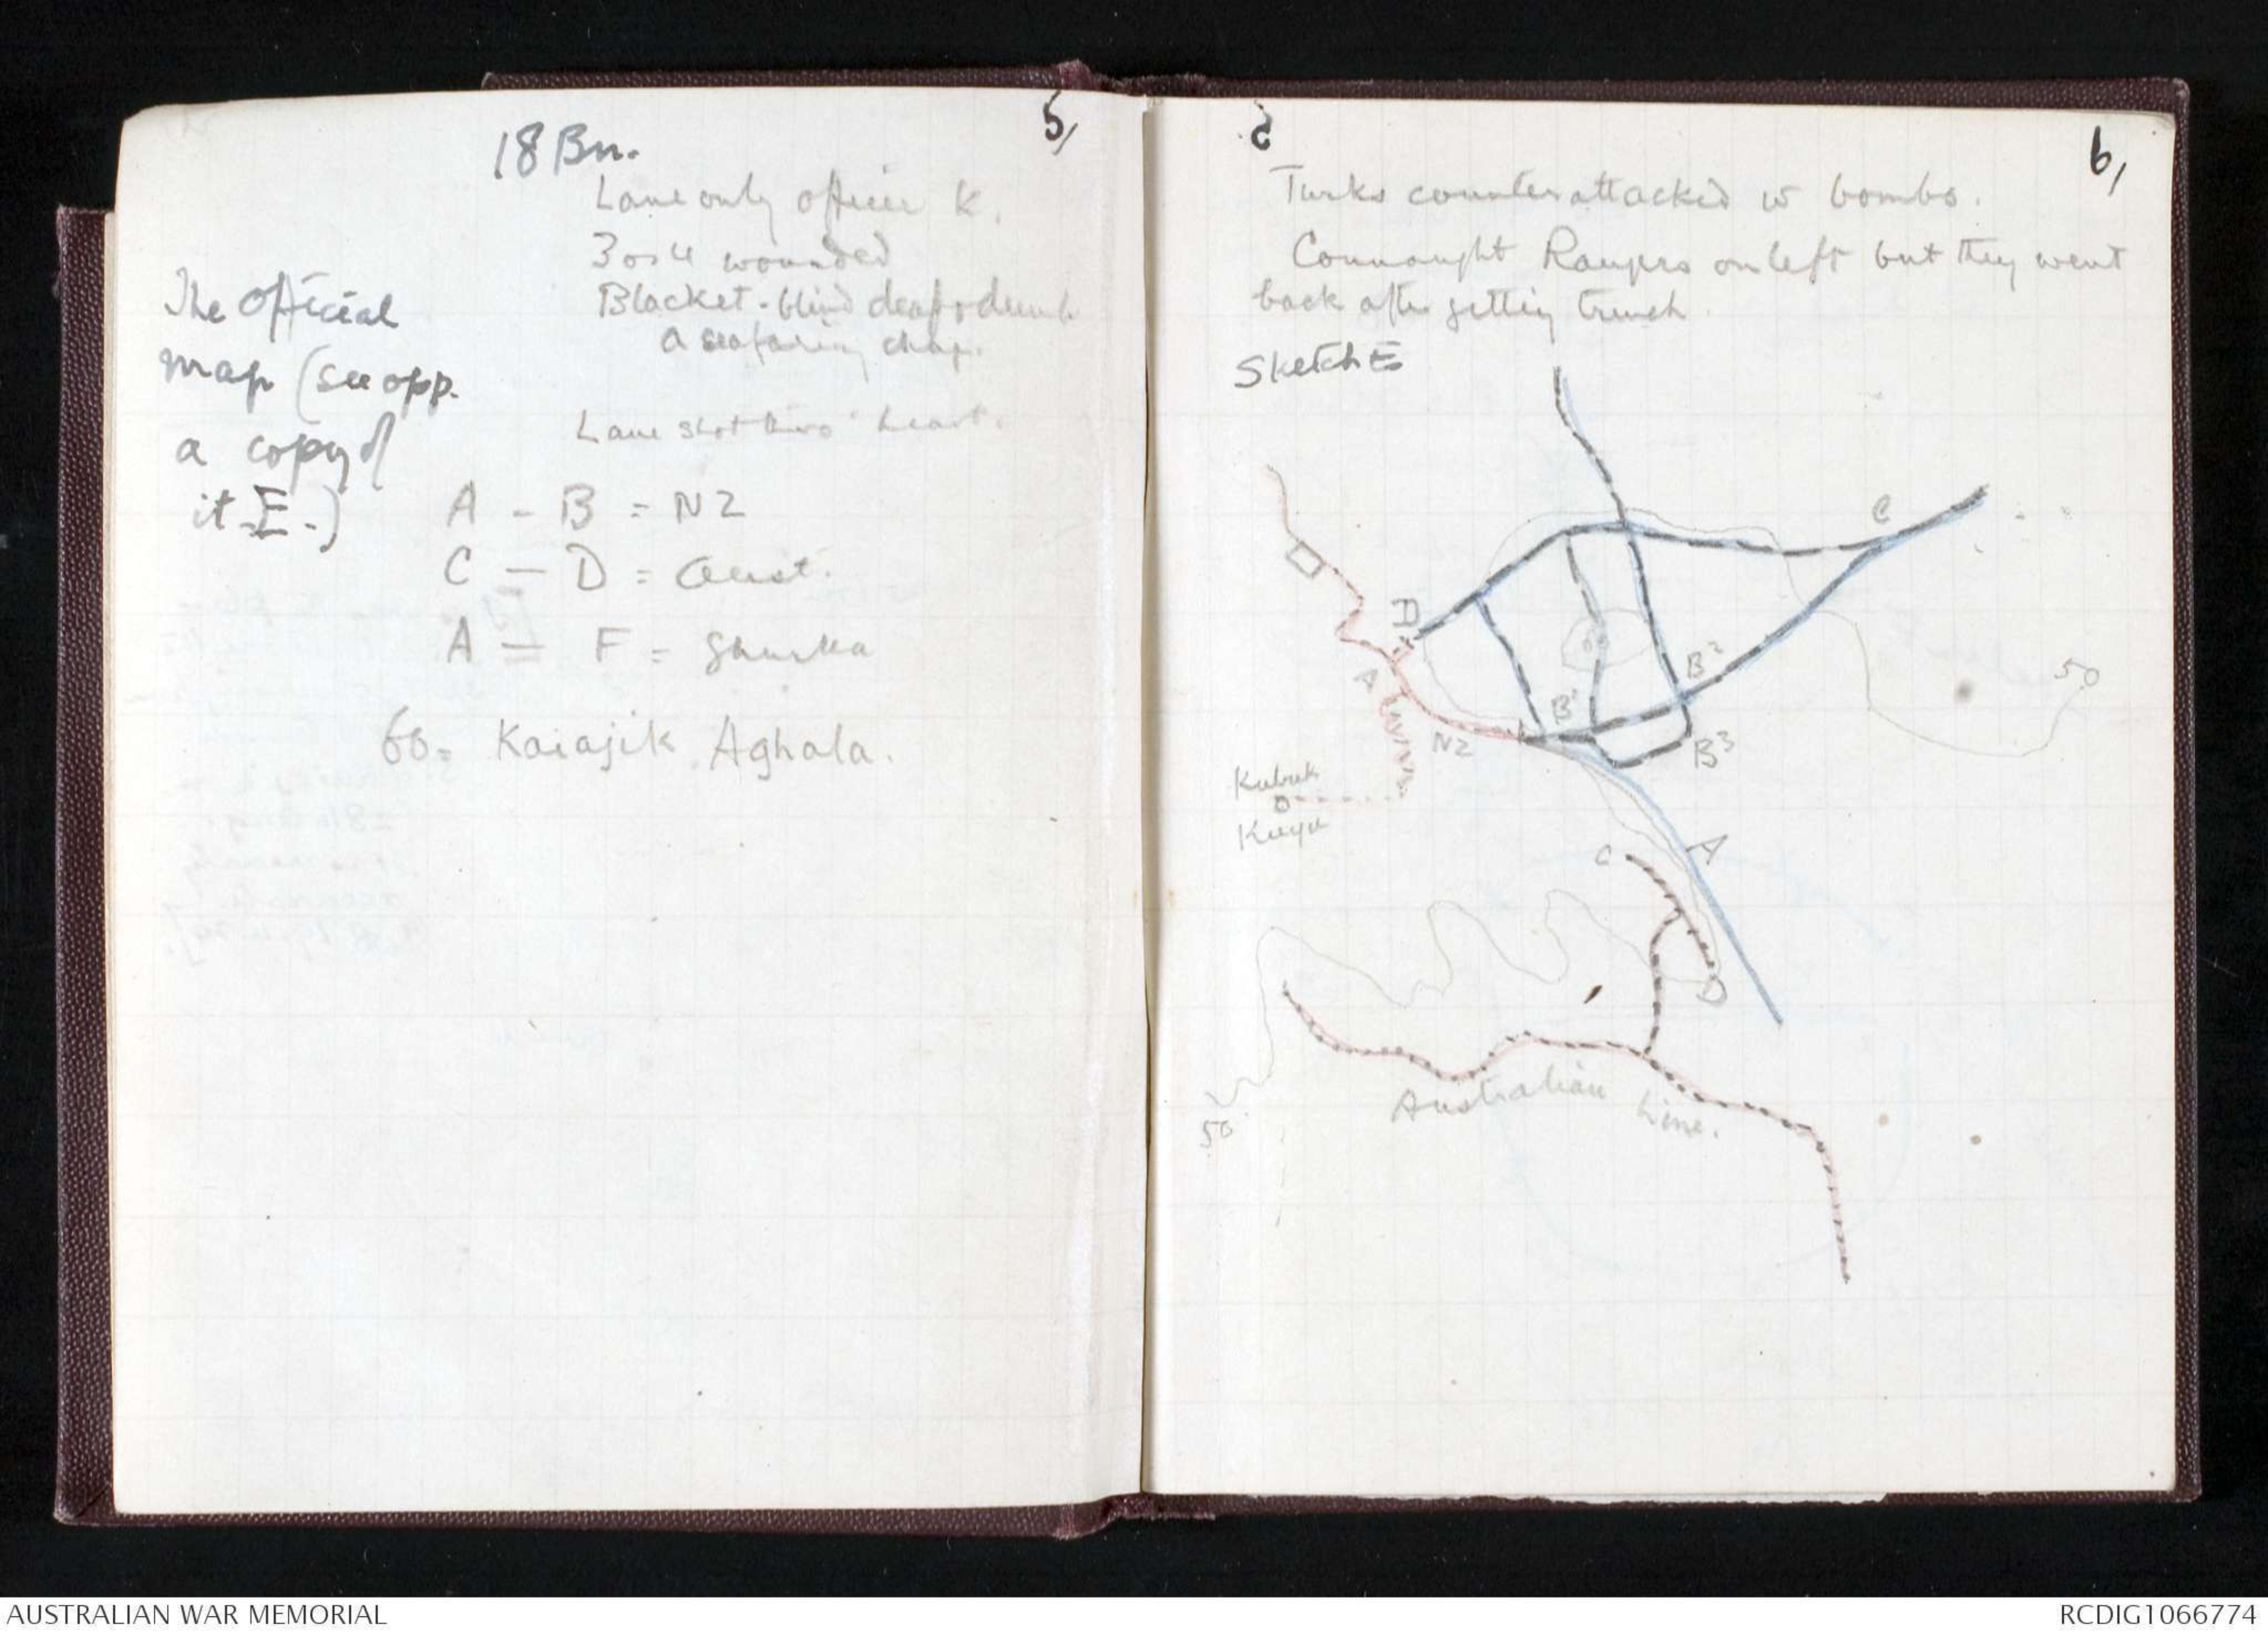
[*The Official
map (see opp.
a copy of
it. E.)*]
A-B = NZ
C-D = Aust
A-F = Ghurka
60 = Kaiajik Aghala
6
Turks counter attacked w bombs.
Connaught Rangers on left but they went
back after getting trench.
Sketch E
Hand drawn diagram – see original
7
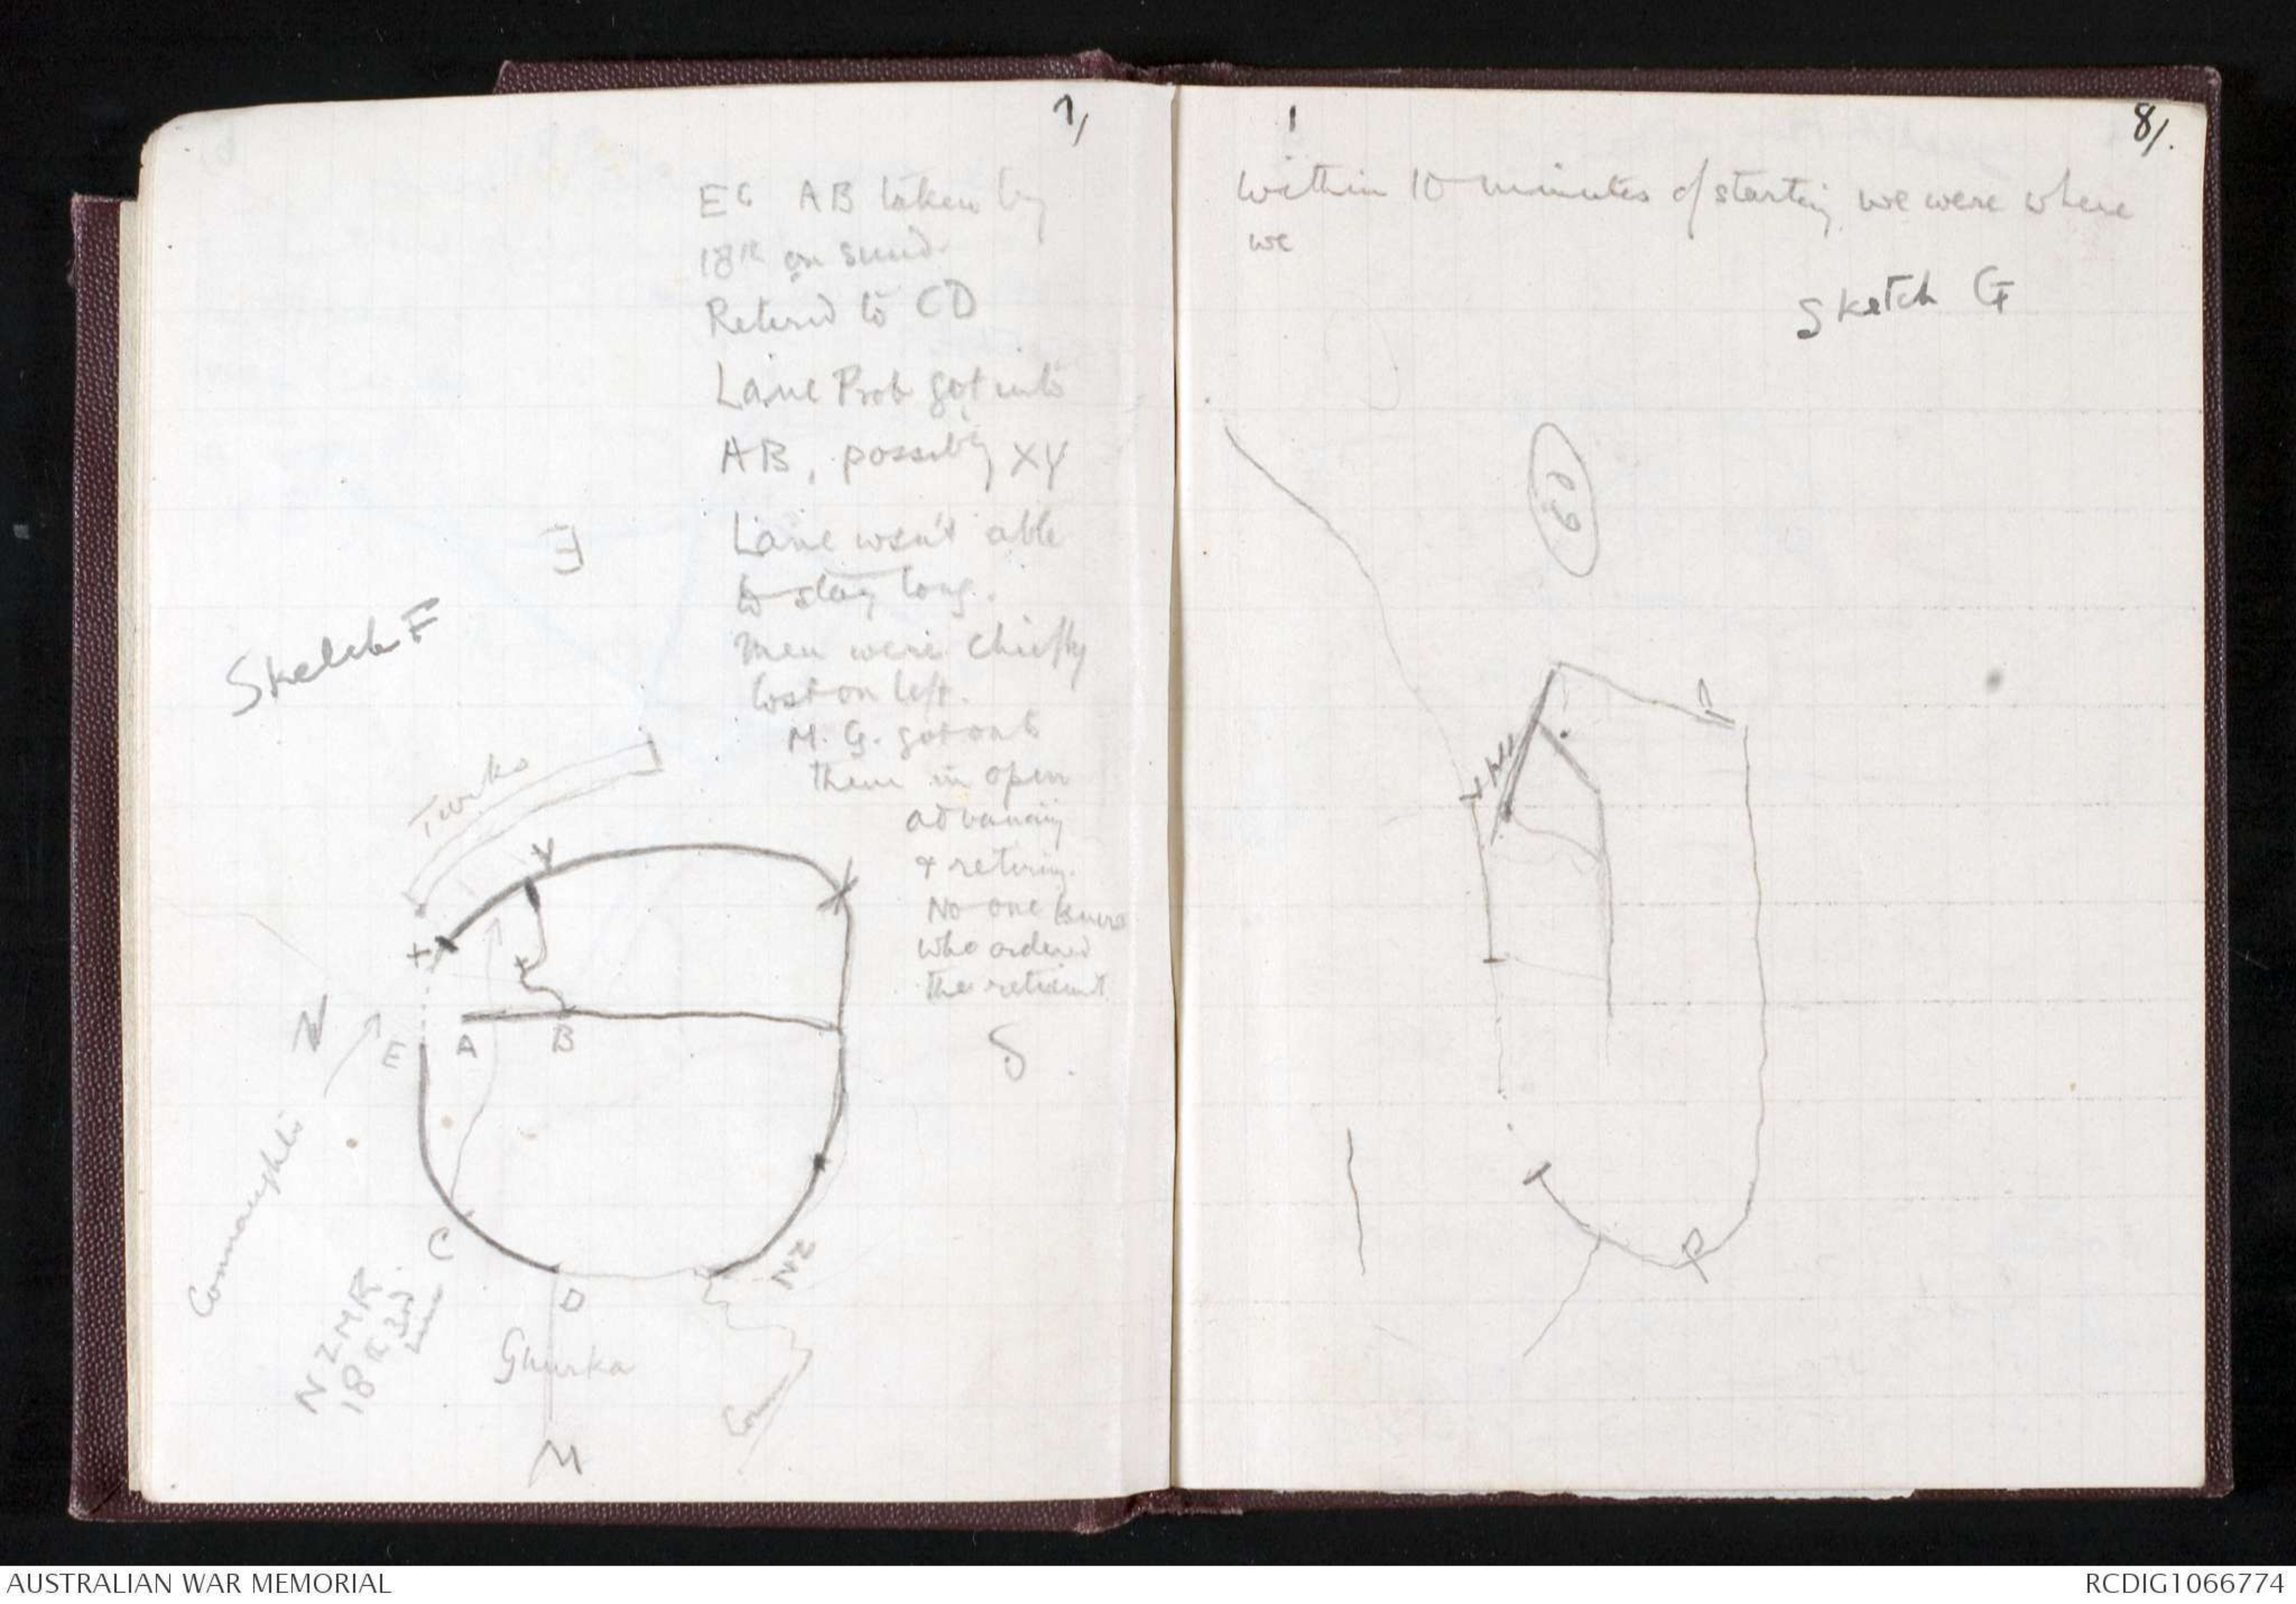
EC AB taken by
18th on Sund.
Retired to CD
Lane Prob got into
AB, possibly XY
Lane wsn't able
to stay long.
Men were chiefly
lost on left.
M.G. got onto
them in open
advancing
& retiring.
No one knows
who ordered
the retirement
Sketch F
Hand drawn diagram – see original
8
Within 10 minutes of starting we were where
we
Sketch G
Hand drawn diagram – see original
9
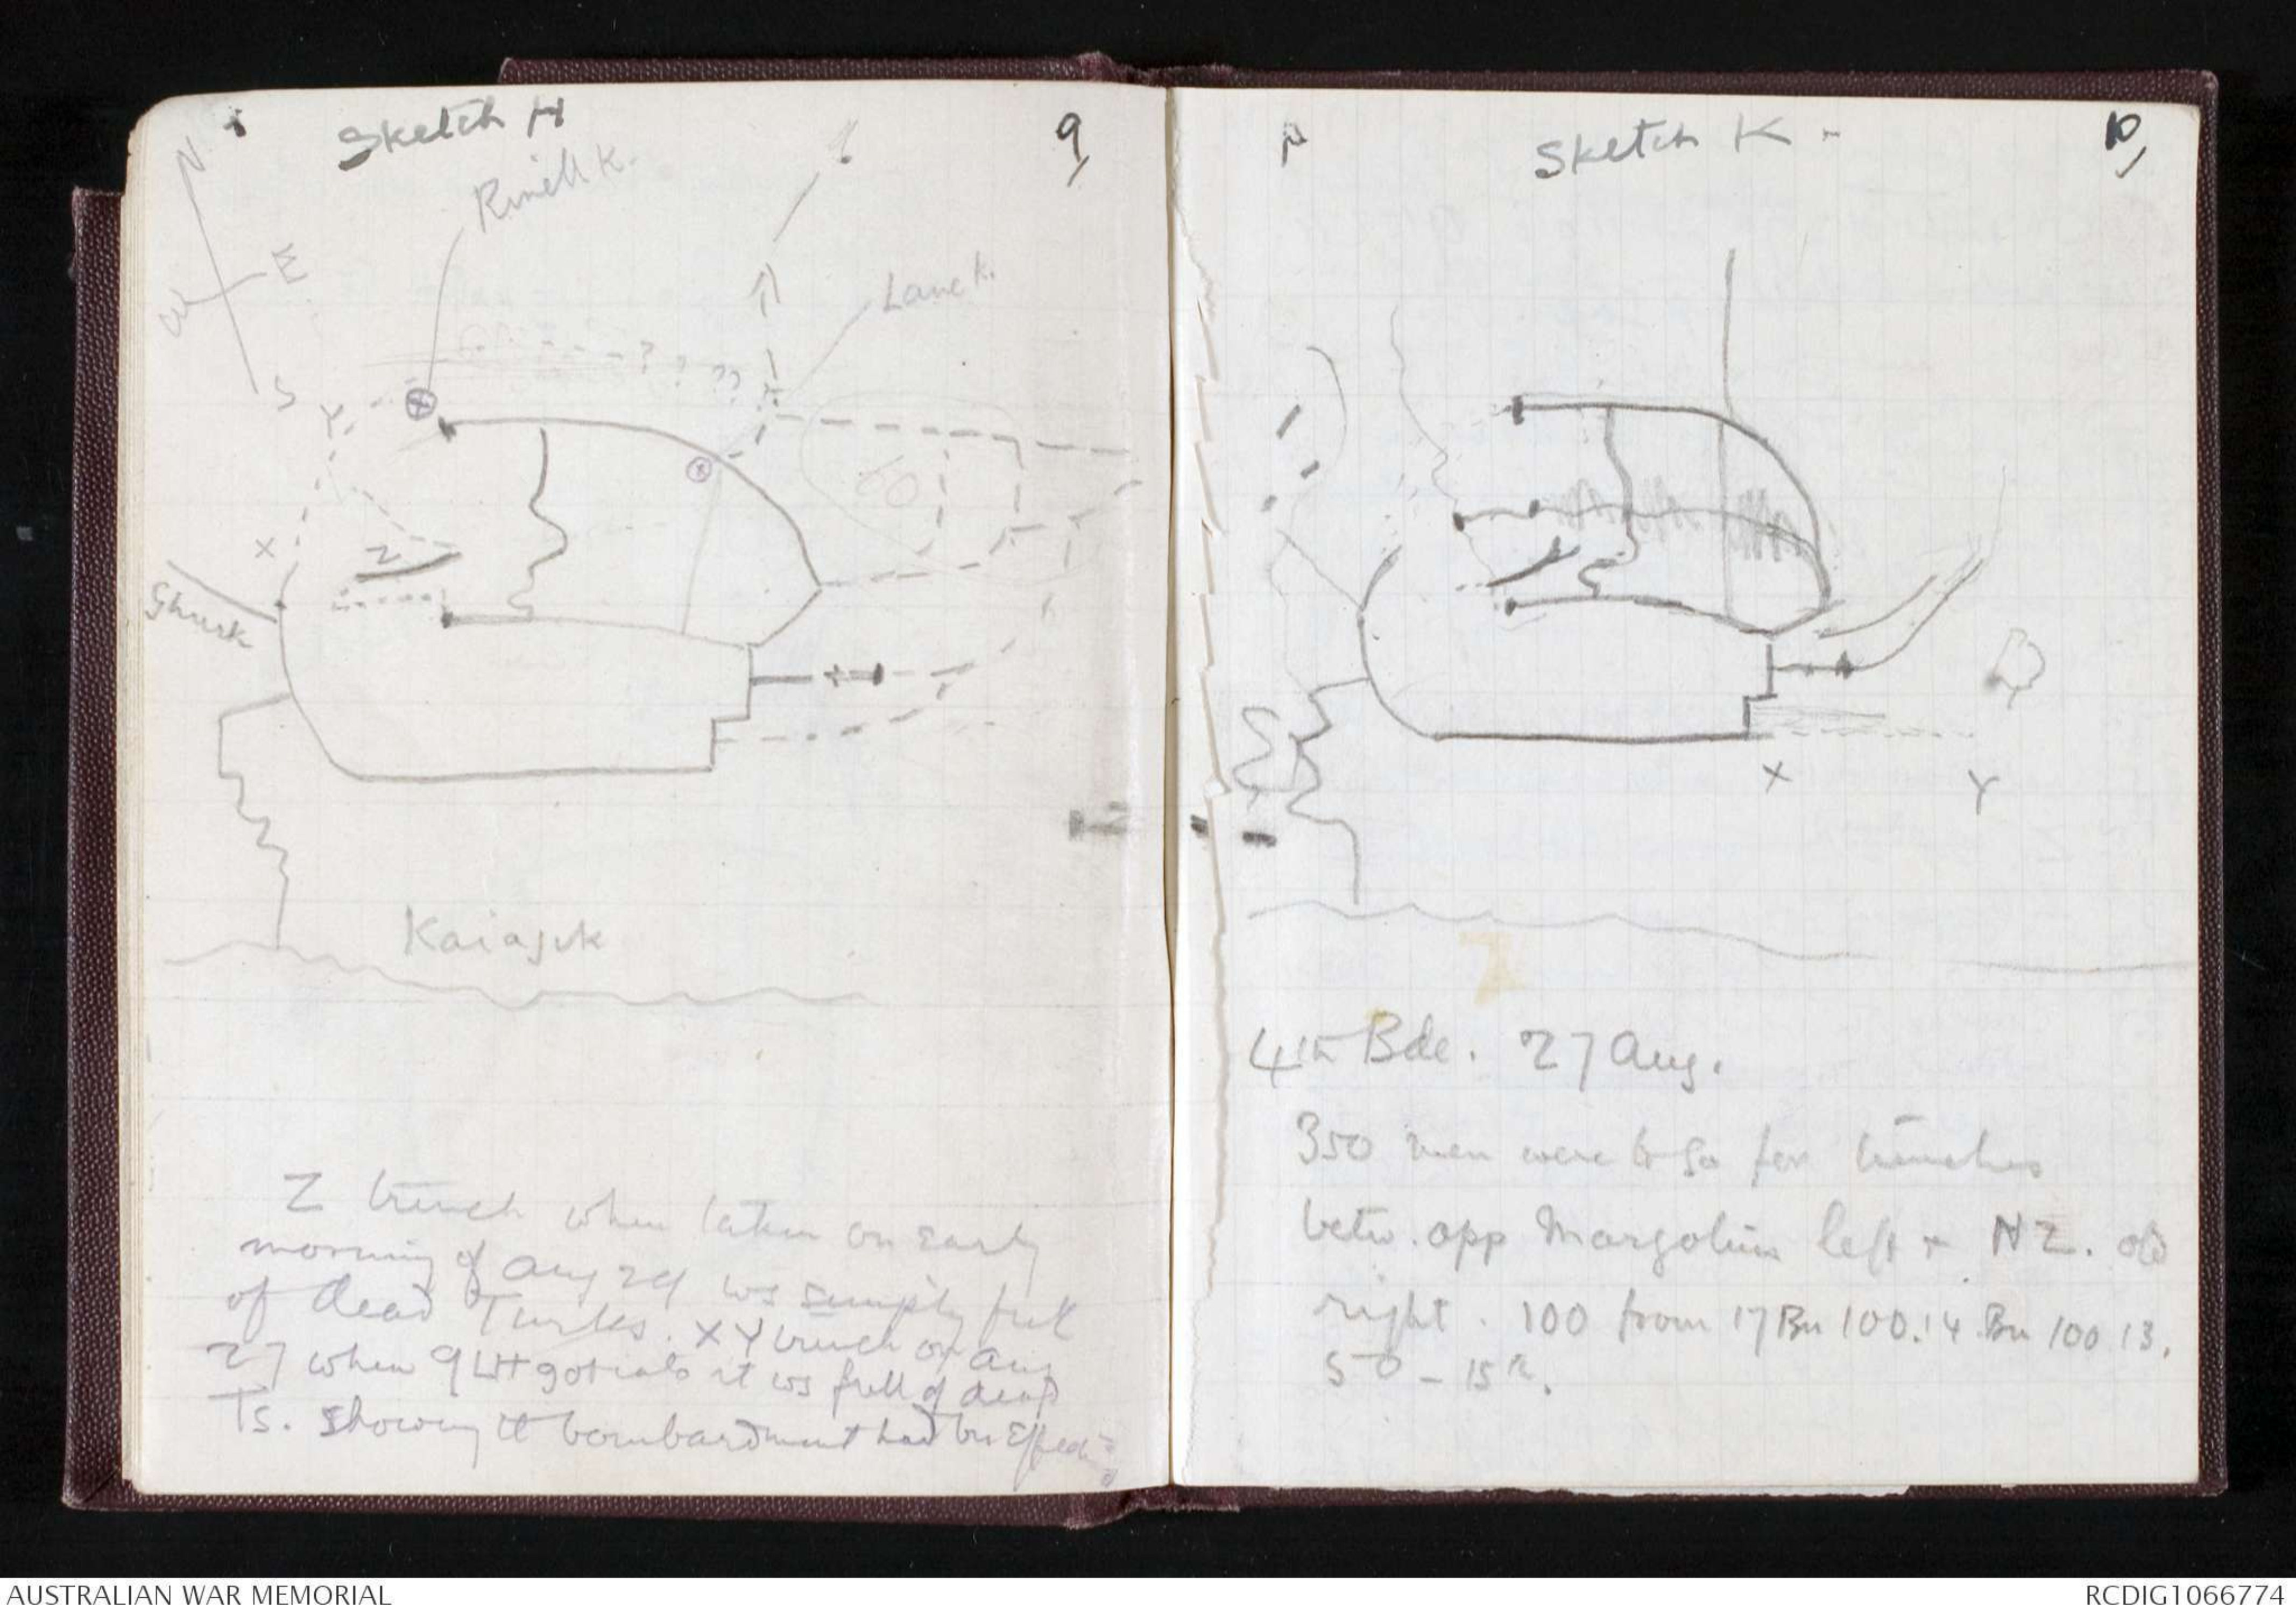
Sketch H
Hand drawn diagram – see original
Z trench when taken on early
morning of Aug 29 ws simply full
of dead Turks. XY trench on Aug
27 when 9 LH got into it ws full of dead
Ts. Showing tt bombardment had bn effective
10
Sketch K
Hand drawn diagram – see original
4th Bde. 27 Aug.
350 men were to go for trenches.
betw. opp Margolins left & NZ. old
right. 100 from 17 Bn 100. 14 Bn 100 13.
50 - 15th.
11
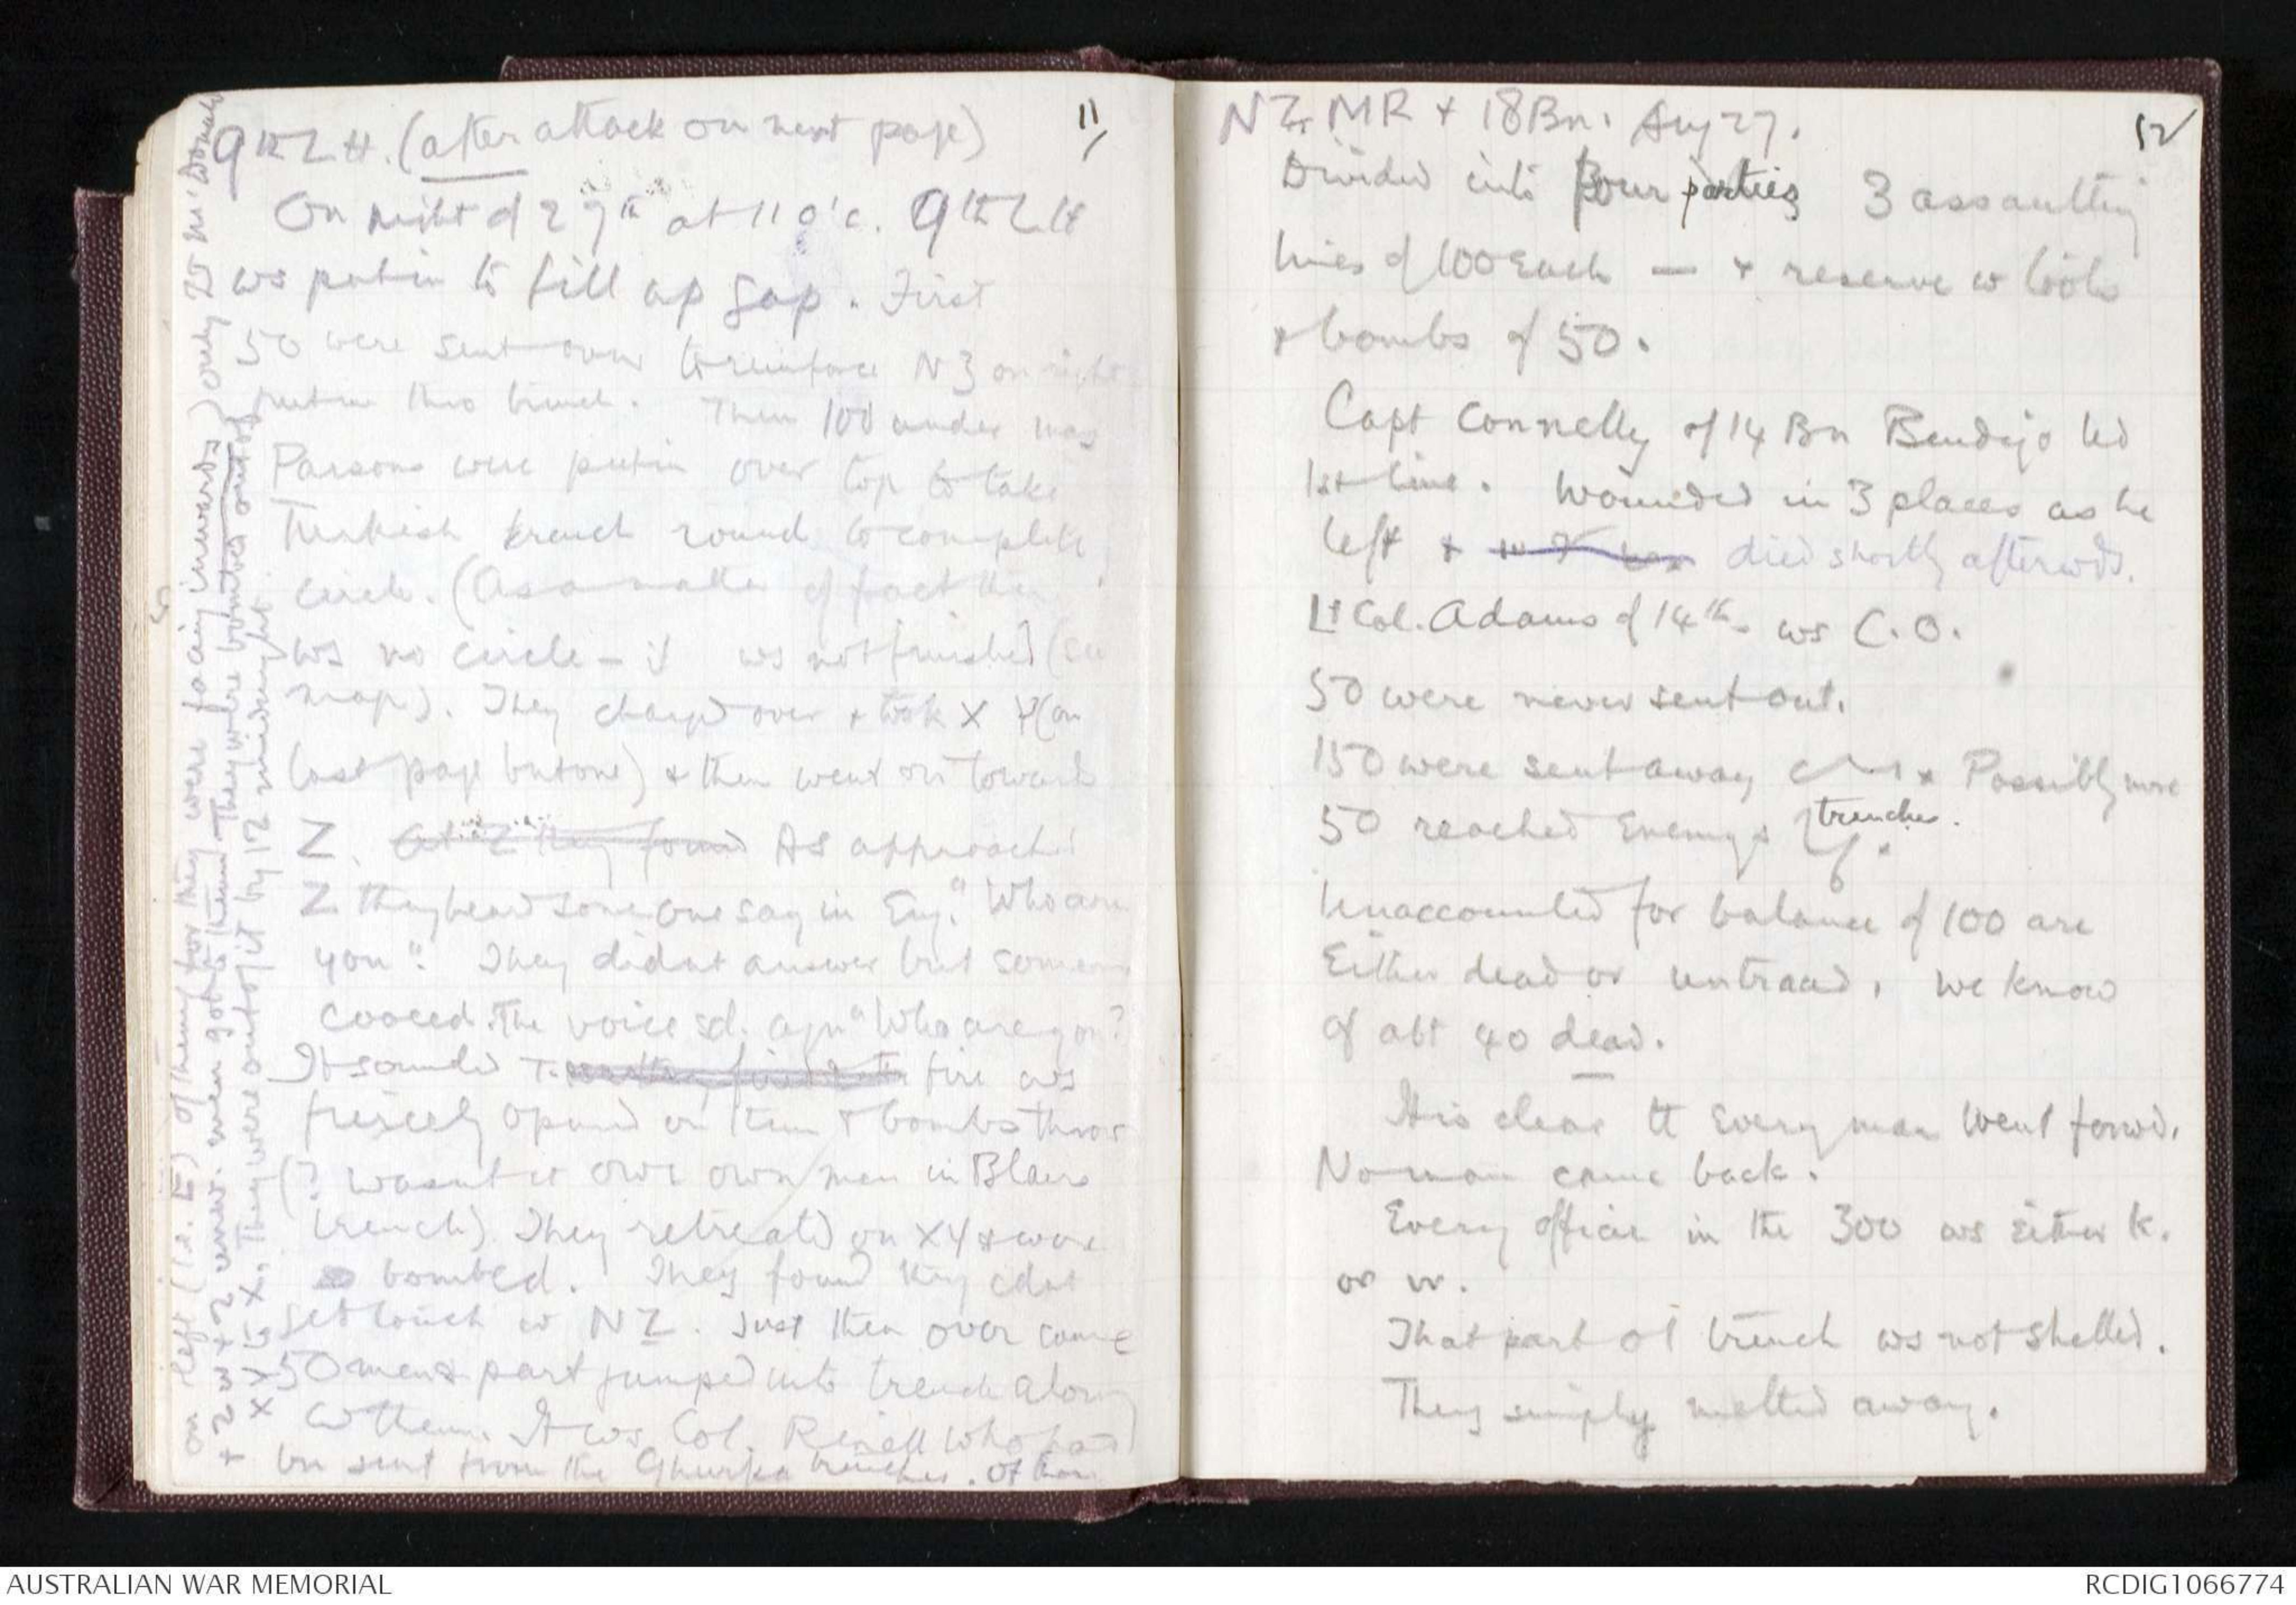
9th LH. (after attack on next page)
On night of 27th at 11 o'c. 9th LH
ws put in to fill up gap. First
50 were sent over to reinforce NZ on right
put in thro trench. Then 100 under Maj
Parsons were put in over top to take
Turkish trench round to complete
circle. (As a matter of fact there
ws no circle - it ws not finished (see
map). They charged over & took XY (on
last page but one) & then went on towards
Z At Z they found As approached
Z they heard some one say in Eng,, "Who are
you." They didnt answer but someone
cooeed. The voice sd. agn "Who are you?
it sounded T. & so they fired at them fire ws
fiercely opened on them & bombs thrown
(?Wasnt it our own men in Blairs
trench) They retreated on XY & wereso bombed. They found they cdnt
get touch w NZ. Just then over came
50 men & part jumped into trench along
w them. It ws Col. Rinell who had
bn sent from the Ghurka trenches. Of those
on left (i.e. E) of them for they were facing inwards) only Lt M'Donald
& 2 w & 2 unw. men got to them. They were bombed out of
XY to X. They were out of it by 12 midnight.
12
NZ MR & 18 Bn. Aug 27.
Divided into four parties 3 assaulting
lines of 100 each - & reserve w tools
& bombs of 50.
Capt Connelly of 14 Bn Bendigo led
1st line. Wounded in 3 places as he
left & [[shorthand]] died shortly afterwds.
Lt Col. Adams of 14th ws C.O.
50 were never sent out.
150 were sent away [shorthand]. Possibly more
50 reached enemys trenches.
Unaccounted for balance of 100 are
either dead or untraced, we know
of abt 40 dead.
It is clear tt every man went forwd,
No man came back.
Every officer in the 300 ws either k.
or w.
That part o / trench ws not shelled.
They simply melted away.
13
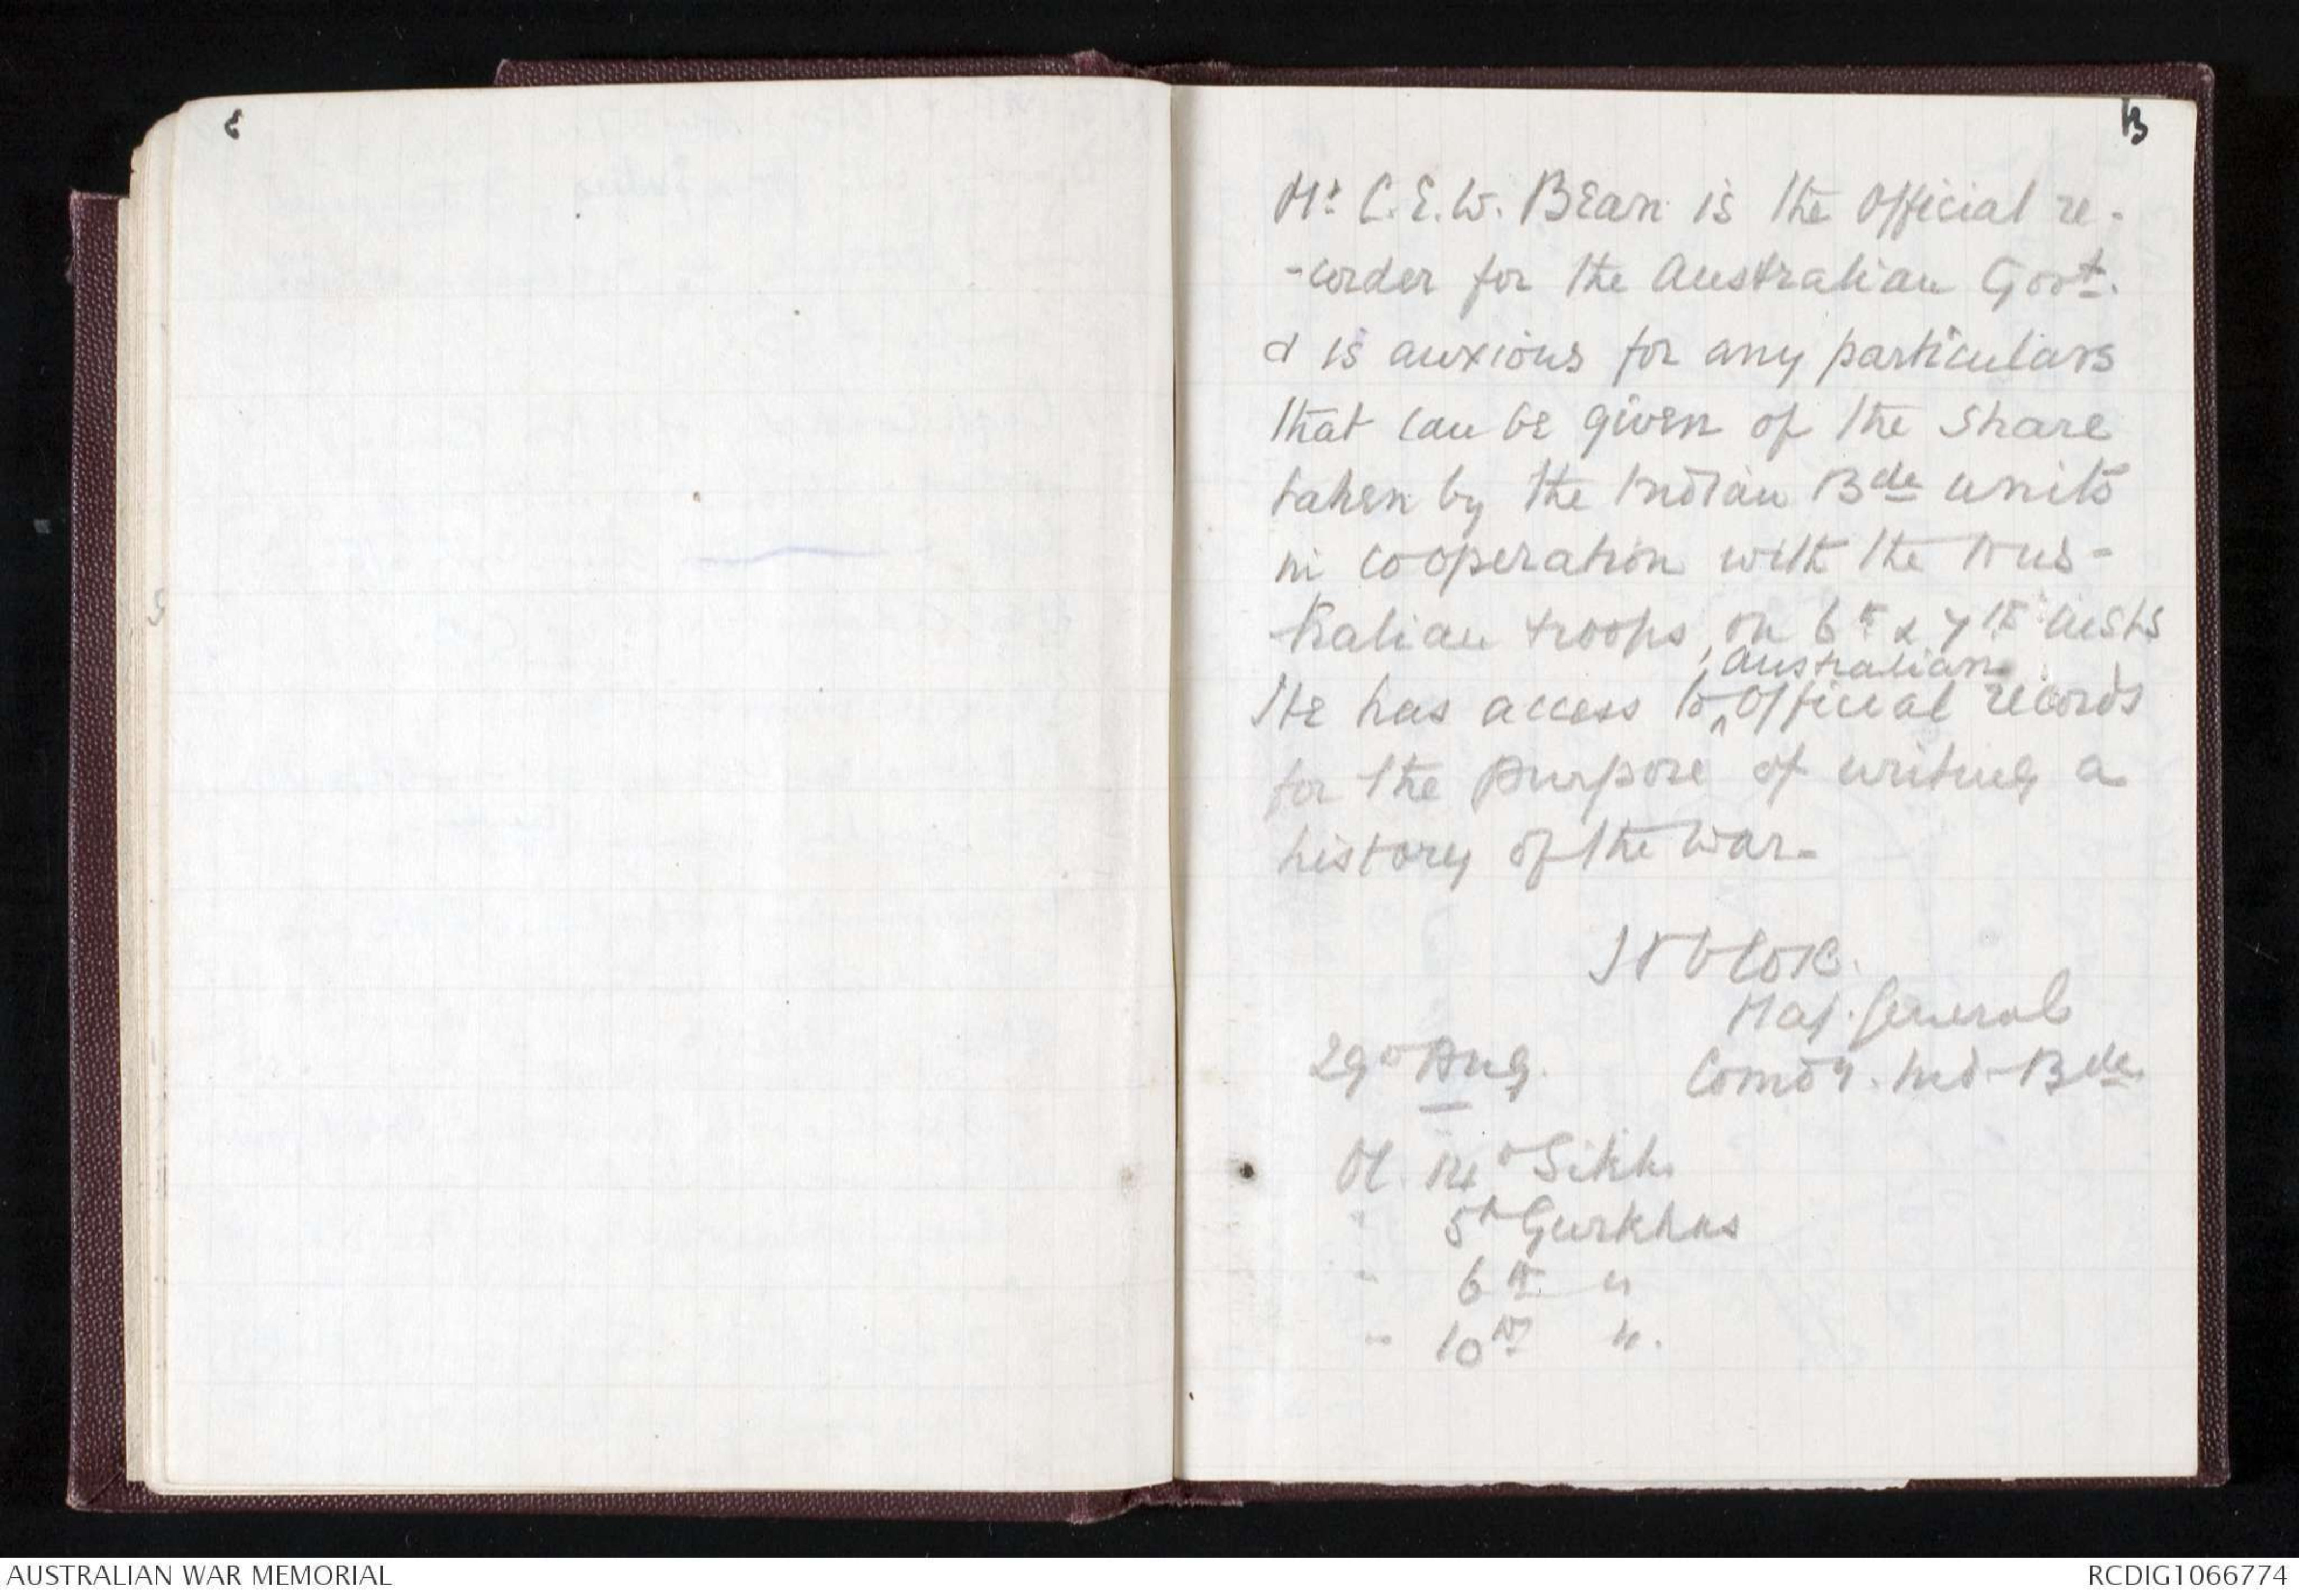
Mr C.E.W. Bean is the Official recorder
for the Australian Govt.
& is anxious for any particulars
that can be given of the share
taken by the Indian Bde units
in co operation with the Australian
troops, on 6th & 7th insts
He has access to ^Australian Official records
for the purpose of writing a
history of the war.
H V Cox
Maj. General
Comdr. Ind. Bde.
29th Aug
O C. 14th Sikhs
" 5th Gurkhas
" 6th "
" 10th "
 Deb Parkinson
This transcription item is now locked to you for editing. To release the lock either Save your changes or Cancel.
This lock will be automatically released after 60 minutes of inactivity.